
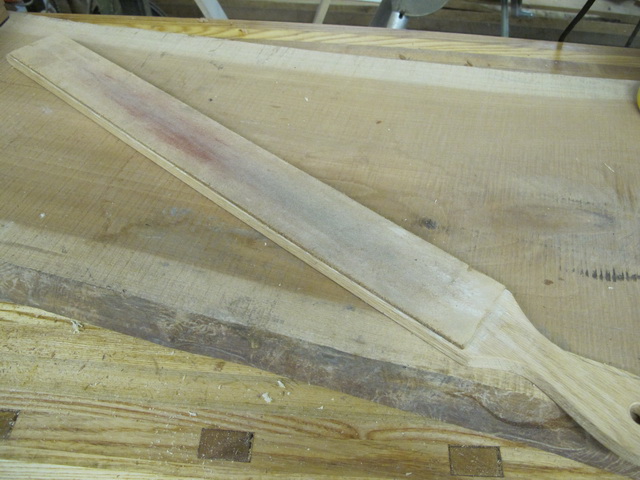
If there’s one thing that can frustrate the beginner woodworker and prevent them from achieving the goal of producing the finest work, it is, without doubt, the sharpness of your tools.
In this post I will look at how, with minimum time and equipment, you can produce a tool with a razor sharp edge. In the previous postI I covered different types of Hones.
In order to ‘hone’ your sharpening skills there are three areas you need to master:
- The mechanics of sharp edges.
- The technology of abrasives and the sequence in which to use them.
- The technique of holding the blade so that a uniform edge can be created consistently and maintained with minimum effort.
What is a sharp?
Ted Edwards, my woodwork teacher, would indicate the sharpness of the tool by shaving the hair off the back of his arm, indicating, he said “…sharp enough to shave with” (I prefer to try the sharpness of a blade by seeing if it catches on the flat of my fingernail – if it skids, it’s dull). At the time, all I could think of, was why would anyone in their right mind want to shave with a chisel? Of course I missed the entire point he was making, that it gave a sense of what sharpness meant in a very visual way. I also had a Building Drawing teacher that said “Collins that pencil isn’t sharp enough to draw blood…
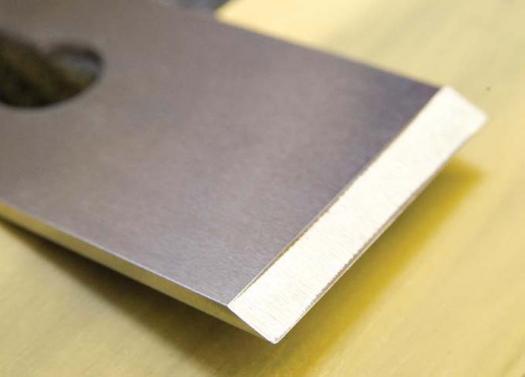
Anyway – back to Sharpness – a blade consists of two planes that meet at a line of intersection. This sharp edge or angle formed by the meeting of two surfaces is called an arris) traditionally the name for two meeting planes in mouldings).
Although the intersection of the back and the honed bevel looks like a triangle to the naked eye it is not since it has a very small thickness – just a few microns across.
If the edge is wide enough to reflect even the smallest amount of light, it is too dull for woodworking – although probably fine for shaving. If there is no glint along the blade’s edge, then it is sharp.
Even if you have a brand-new chisel or plane iron it needs honing, (commercial products are mass-produced and while they have great edges, it is uneconomical for the manufacturer to hone each and every tool to a razor edge).
New Tool Edges
The edge has three flaws that must be removed by honing:
- Coarse edge texture.
2. The back
3. The burr
The most important thing you can come away with from this post is the technique for holding and moving a tool on a stone. Holding a tool consistently and easily is the key to sharpening, and with practice, it’s not that difficult to do and after a few times muscle memory will kick in.
There are a many devices out there, that companies will gladly take your money, that you can buy to hold a blade at just the right angle to a honing stone.
My favorite, and one that is available on many online auction sites, is the Elipse 36 Honing guide
I have several honing guides – but before you rush out and buy one, there are two important things to consider:
1) honing guides allow you to repeat a motion, but you run the risk of wearing in certain spots faster and the stone will require more maintenance. (more so on oil and whetstones).
2) the second problem with honing guides is more subtle: The first time you sharpen you establish some sort of bevel, the second time you sharpen you need to maintain the same exact bevel, if it’s not exact, you tend to create a secondary and then tertiary then whatever comes after bevel at each attempt to sharpen. In fact, if you continue this with the same setting, you will actually create a multi-facetted bevel – the change is subtle, and over time, ultimately leads to a curved profile (hard to work with a curved edge).
This process makes for more work because at some point you will need to regrind. Even if you can get the same bevel, setting a blade in a jig exactly the same way is tedious and time consuming.
I find it more efficient to be able to just take a tool and immediately put it to a stone without having to worry about setting up a jig.
As an aside, some make the argument against hand tools that it’s hard to make them work. A hundred years ago and more, people made hand tools work… They had no choice they didn’t have power tools or Hi-Tech guides. Woodworkers were able to be productive by having the right tool and developing the right skills to maintain and use them properly. If you can duplicate that skill, you can be just as productive.
So here’s my 10 minute guide to sharpening using diamond hones:
1) Establish an edge at approx. 25° using the Corse stone (300)
2) Follow this with a Diamond 1000 – this will remove striations created by the 300 .
3) Follow with a fine (8000 grit) – this puts a keen edge on the tool
5) Finish with a 16000 – this hones the blade to a razor edge
Now to put a micro bevel of 30° on the blade. Incline the blade at a steeper angle to approximately 30° and repeat the 5 steps above.
This will add a micro bevel to the edge of the blade.
There is a slight variation when honing a plane iron.
After all the honing is done, take a thin ruler about .5mm and lay it along the edge of the finest stone. then rest the plane blade on the ruler so that the cutting edge is about 6mm from the opposite edge of the stone. spend about 1 minute honing a micro-micro bevel on the back of the plane iron.
At each step it is important to remove the burr on the backside by running the back of the blade a few time across the stone to flatten the back and remove the burr (wire edge).
6) Strop with diamond paste this will put a mirror finish on the tool. You can also strop using the palm of your hand – do this slowly at first and always pull the blade away from you – after a while you can develop rapid movement.
Technique and stance to hone the blade manually.
Spritz the stone with water and then standing in a comfortable position perpendicular to the bench. Holding the blade on the stone rock it up and down until you find the point at which a bead of water/oil appears in front of the blade – then lock your elbow at your side and hone the blade on the honing stone in a figure of eight moving your body back and forward.
If you’ve just done a chisel, block-plane blade or any other chip-breakerless iron you are finished! But if you’re working on a bench-plane, you need to polish the cap iron’s edge that touches the iron. Make sure the cap iron, when tightened in position on the iron, makes complete contact along its entire edge with no daylight showing – this way no shaving will catch between iron and cap iron. Now polish the cap iron surface. How much work depends on its condition. Use the same abrasives starting no coarser than you must. Cap irons usually are not hardened steel and the work to flatten should be quick. Rock and slide the cap iron along the different grits until all coarse scratches are gone and the ‘ramp’ edge looks and feels smooth.
Now you’re done!
Resharpen often and lightly, no coarser than necessary, to insure good cutting performance and save time in the long run.
One of my favorite woodworkers is Garrett Hack – check out his honing method.
Happy safe honing – and may the grain always be with you!
Very instructive Michael and- most useful advice – thanks.
You are very welcome – I do have a couple of additions to the second post on sharpening – that relate to the holder I use for honing – will update over the weekend
Michael, can you sharpen with ceramic. There is a knife sharpener called ‘crock stick’ ?
Thanks Lars for your question. I have used a Crock Stick for at least three decades. For those of you that are not familiar with Crock Sticks, they consist of two ceramic rods about 3/8″ in diameter and 9″ long that are inserted into a wooden base at an angle of approx. 10 degrees to the vertical, giving an overall cutting angle of approx. 20 degrees although this angle can be varied by changing the angle of attack.
I grind my every day chisels and plane irons to 25 degrees and the hone the edge to 30 degrees, an edge of 20 degrees or less would be fine for a paring chisel and greater angles for mortise chisels. Crock Sticks are specifically designed to sharpen long blades such as knives. I imagine it would be quite difficult to sharpen plane blades due to the ‘V’ configuration of the ceramic rods. However, you might be able to sharpen in-canel gouges (gouges with the bevel inside) and also drawknives – which I might try. But for Plane Irons I will stay with honing stones.
I am happy to see that you promote freehand sharpening over the use of jigs.
However what I did not understand is why you say that “it is uneconomical to hone each and every tool to a razor edge”. I am curious about your thoughts behind this statement.
Thanks for your interest. I am referring to mass-produced products. From my experience with buying chisels and planes the blades do not appear to be as sharp as they could be and I have always honed/tuned-up new blades before using. I even did this to a set of Stanley Sweethearts I just bought even though they appear to be very sharp. I could be wrong, but with modern mass-production going that extra mile and putting a razor edge on each tool that leaves the factory may be uneconomical.
I recently saw Rob Cosman take a brand new WoodRiver plane and tune up the entire plane, including sharpening the blade http://youtu.be/bx-D9hsaosM and lapping the sole. If they came from the manufacturers in ready to use state there would be no need to do theses things. Of course we could just be overly particular.
You are completely right. I had interpreted the sentence wrong and was under the impression that you meant that it was not economic to have razor sharp tools. When it comes down to sharpness we shouldn’t compromise as you clearly explain.
Btw, how do you like the SW chisels?
I like SW chisels a lot. I did have to ‘tweak’ the handles a bit with sand paper as they were very smooth and some just fell off. But once roughed up they are great!